
Hey lovely readers!
Today, I’m dishing out the deets on the most swoon-worthy dessert that’s just in time for the season of love – the most perfect Romeo and Juliet Cheesecake Recipe!. I’ll be honest with you; there was a moment when I doubted I’d pull this off in time for Valentine’s Day. I may or may not have been running around the kitchen like a headless Cupid trying to make sure everything was perfect. But hey, we made it, and now I’m ready to spill all the details on this beautifully delicious guava cheesecake.

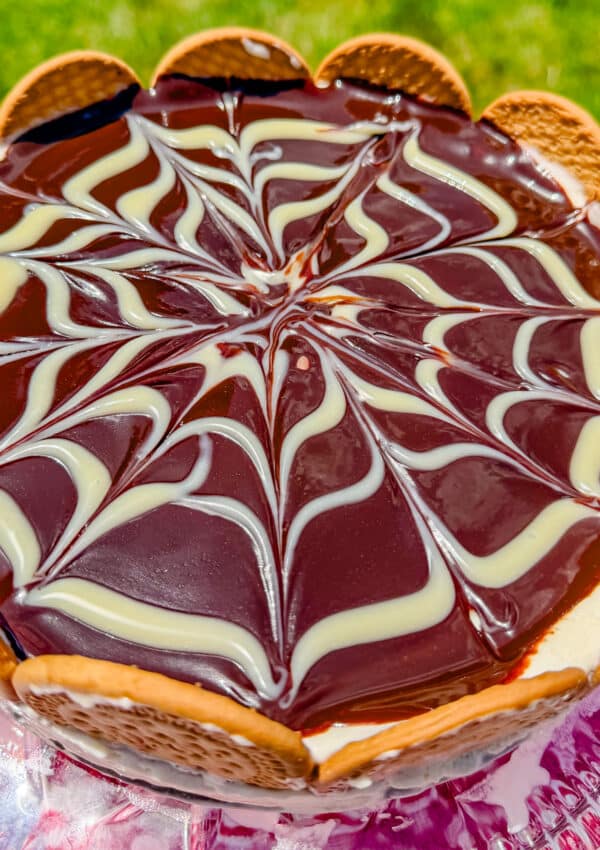
Picture this: a flawless cheesecake, smoother than Shakespeare’s sonnets, not too sweet – because love should be just right – and covered in guava paste glaze. The color alone is enough to make your heart skip a beat.
And now, let’s talk about the star-crossed lovers – the combination of guava paste and cheese. Also known as Romeo and Juliet (or Romeu e Julieta in Portuguese). This perfect pair was destined to be together, like peanut butter and jelly, like socks and dryers, like… well, you get the gist.
Flashback to my days in Brazil, where cheesecake wasn’t really something that was common. I mean, who came up with the idea of combining cheese and cake? It’s like saying, “Hey, let’s throw these two unrelated things together and see what happens.” But then, things got even weirder – it was rare to find cheesecake with guava. Say what? Cheesecake and guava were practically cosmic soulmates, and they were being kept apart!
That’s when the lightbulb moment struck, and the inspiration for this heavenly Romeo and Juliet Cheesecake was born. It’s time to break down the walls, tear up the script, and let these star-crossed flavors unite in delicious harmony.
So, buckle up, buttercup! We’re about to embark on a culinary love story that’ll make your taste buds swoon. Get ready to fall head over heels for the Romeo and Juliet Cheesecake – where guava and cheese live happily ever after on your dessert plate.

Table of Contents:
Tips for making and baking cheesecake
Equipment:
- Stand Mixer and Paddle Attachment: It’ll help blend the ingredients in your stand mixer, ensuring a smooth and dreamy cheesecake filling. I recommend the paddle attachment over the whisk attachment. With cheesecake we do not want to incorporate too much air or it may crack.
- 9 inch spring form pan : This makes it easy to release and serve
- Large roasting pan*: This is where you will be pouring water for the water bath.
- Larger Pan**: This will accommodate your springform pan, and will be placed on top of the roasting pan. This can be a larger 10 inch pan for example, or anything else you have around. The goal here is to protect your cheesecake and ensure it does not get wet.
Equipment Notes and Tips:
If you do not have a roasting pan or a larger pan to accommodate the springform pan, an alternative would be to use one of those disposable aluminum trays you get from the grocery store. You can keep them around for this purpose, and it is a smaller investment than buying a roasting pan. Also, if you notice, it is what I am using here because I do not have a roasting pan.
I first came across this tip about using a springform pan inside another pan on America’s Test Kitchen. You can check out the video where they explain it over here. So far, I think it has been the best way to cook cheesecake without worrying about water seeping into it, without needing to cover anything in aluminum foil, avoiding a wet crust, or, worst-case scenario, preventing your cheesecake from cracking due to sudden temperature changes.

WARNING: Cheesecake is a finicky dessert and expensive dessert. It requires planning and preparation. Carefully read through all my tips, and I guarantee a crack-free cheesecake if you follow ALL of the advice given!
Tips for making and baking cheesecake:
These are my very best tips for baking a crack-free cheesecake:
- Use a Water Bath:
- I know many people hate water baths, because they hate having to wrap their pans in foil just to end up with soggy cheesecake. Well like we talked about it this isn’t an issue here. There will be no cheesecake getting wet, so you can relax.
- All you have to do is place your springform pan inside another pan to prevent leaks, and if a large roasting pan isn’t at your service, those disposable aluminum ones from the store will do the trick. Carefully position it in the oven and fill it with warm tap water until it reaches about halfway up your cheesecake pan.
- Choose Your Cream Cheese Wisely:
- Opt for the brick-style cream cheese, not the spreadable version in tubs.
- Bake Time:
- Bake time can be a mystery, affected by various factors like your oven, the pan color, and the temperature precision of your ingredients. Start checking at 50 minutes, and add time as needed. It’s not uncommon for the cheesecake to take up to 1 hour and 30 minutes to bake.
- Don’t fret if it’s still a bit wobbly; it’ll continue to cook as it cools.
- When you touch it, it should not be sticky to your fingers – that’s the sign of a well-baked top. Avoid overbaking and resist the urge to play peek-a-boo with the oven door.
- Remember that sudden temperature changes do make your cheesecake crack, so try to minimize the amount of times you open your door, and only do so when you think that your cheesecake is done. Absolutely do not open your door in the beginning of the baking process. Let it bake undisrupted for at least 50 min
- Place your hands on the oven door, and with a small, controlled movement, observe the cheesecake’s “wobble” without opening the door. The aim is for the edges of the cheesecake to remain firm, while the center should exhibit a gentle, Jello-like wobble.
- Avoid waiting until the entire cheesecake loses all signs of wobbling, as this could result in over-baking and increase the likelihood of cracks.
- If the entire cheesecake still wobbles, turn off the oven light and give it a few extra minutes.
- Cooling:
- Cool your cheesecake slowly to avoid those cracks. Start by opening the oven door, taking extra care if you have little ones on the loose.
- Then, place it on top of the oven, the warmest spot in the house after a baking session of over an hour. This gradual cooldown will minimize cracks and ensure a smooth finish.
- Only after reaching room temperature should your cheesecake be placed into the fridge
Preparing Your Cheesecake:
- Ingredients at Room Temperature:
- Your ingredients should be at room temperature. Making cheesecake requires careful planning, and you need to get everything out of your fridge early so that by the time you make your cheesecake, everything has warmed up to room temperature. This is especially important with your cream cheese.
- Cold cream cheese is challenging to mix, resulting in lumps. Trying to eliminate these lumps can be frustrating, leaving lumps in your batter. Overbeating everything in an attempt to smooth it out will incorporate too much air, ultimately leading to cracks. So, I can’t stress enough – use ROOM TEMPERATURE ingredients.
- Scrape the Sides of the pan: Make sure that you scrape down the sides of your bowl from time to time to make sure everything gets mixed together and there are no lumps left behind.
- Mixing with Precision:
- Before introducing the eggs, mix the cheesecake ingredients (minus the eggs) thoroughly. Eliminate any potential lumps in the cream cheese. You need to do this because overbeating the eggs will incorporate too much air into your batter, and yes it will lead to cracks.
- Eggs:
- Handle eggs with care. Once added, mix the eggs as sparingly as possible to avoid unnecessary air.
- Crust: When adding the crust to your pan go for rounded edges as opposed to 90-degree angles. This will help your crust stick together and not crumble when you get it out of the pan.
- Drop your pan: Yes you read this right. Right before baking, carefully drop your pan against your counter to get rid of any potential air bubbles that might be in your batter. ( I will soon upload a video so you can see what that looks like)
Ingredients:

For the Crust:
FYI: This is enough to cover the sides and bottom of your 9-inch pan all the way to the top, if you don’t want this much crust you can halve the recipe. Check out the pictures so you know what I am talking about.
- 100 grams of chopped walnuts
- 280 grams of graham cracker crumbs (you can buy them or crush them on your own using a food processor or a rolling pin and a ziplock bag)
- 3 tablespoons sugar
- 120 grams melted butter (or use unsalted butter + pinch of salt)
Cheesecake:
- 32 oz cream cheese (910g, 4 blocks), softened to room temperature
- 1 cup sugar (200g)
- 2/3 cups sour cream (160g)
- 1 ½ teaspoons vanilla extract
- 4 large eggs, room temperature, lightly beaten
Guava Glaze:

- 460 grams of guava (If you do not know what guava paste is or where to find it, check the FAQ section.
- 1/2 cup water
- 2 tablespoons
Directions:

Preheat and Crust
- Preheat the oven to 325°F (160°C).
- Grease your pan with butter
- Crush graham crackers and walnuts, add sugar, and mix with melted butter.
- Press into a 9” springform pan.
- Bake your crust for 10 minutes and let it cool while you prepare the cream cheese mixture

Cheesecake Mix:
- In a stand mixer, blend cream cheese until smooth. (use paddle attachment, and remember to use room temperature ingredients)
- Add sugar, sour cream, and vanilla; mix well.
- Gradually add lightly beaten eggs, stirring after each addition. Be careful not to incorporate too much air. (see tips*)
Bake:
- Pour batter into the pan.
- Place inside a larger pan.
- Place both pans inside a large roasting pan with warm water halfway up the sides.
- Bake at 325°F (160°C) for 50-60 minutes (possibly longer, check my tips)
Cool
- Turn off the oven and let it cool inside for 10-15 mins.
- Remove it from the oven and let it cool on top for an additional 10 minutes.
- After it has been cooling outside the oven for about 10 minutes, gently loosen the crust with a knife all around your cheesecake.
- Now, leave it on top of your oven to cool for 1-2 hours, then refrigerate overnight.

Guava Glaze
- In a saucepan, melt guava your chopped guava paste with water.
- Pour over chilled cheesecake.
How to Serve and/or Pairings:
This show-stopping dessert isn’t just for Valentine’s Day – it’s perfect for any occasion that calls for a touch of sweetness and a dash of romance. I even made it for my birthday this year. Plus, the vibrant red color of the guava glaze makes it a show-stealer for Christmas festivities too. Serve it with a nice cup of coffee. (see here all my tips to make the best cup of coffee)
And here’s a little insider tip: if you’re a guava fan (and who isn’t?), don’t forget to check out my Cornmeal Cake with Guava – which shares the same sensational glaze.
Storage Instructions:
Now, what if you find yourself with a slice (or two) left over from your love-filled celebration? Fear not! Simply cover your cheesecake and store it in the refrigerator. It’ll last a few days – that is if it lasts that long without being devoured.
Common Substitutions/Variations:
Not feeling the walnuts? No problem! You can either omit them or swap them out for an equal amount of crushed graham crackers. Also, if you prefer your cheesecake to not have as much crust, feel free to decrease the crust amount. Just keep in mind that without the crust, your guava glaze might decide to drip down the sides of your cheesecake.

Romeo and Juliet Cheesecake Recipe
Equipment
- Stand Mixer and Paddle Attachment
- 9 inch spring form pan
- Large roasting pan This is where you will be pouring water for the water bath.
- large pan This will accommodate your springform pan, and will be placed on top of the roasting pan. This can be a larger 10 inch pan for example, or anything else you have around. The goal here is to protect your cheesecake and ensure it does not get wet.
Ingredients
For the Crust
- 70 grams of finely chopped walnuts use a food processor or a knife and a cutting board
- 200 grams of graham cracker crumbs (2/3 cup) you can buy them or crush them on your own using a food processor or a rolling pin and a ziplock bag
- 3 tablespoons sugar
- 90 grams melted butter (6.5 tablespoons) or use unsalted butter + pinch of salt
For the Cheesecake
- 32 oz cream cheese 910g, 4 blocks, softened to room temperature
- 1 cup sugar 200g
- 2/3 cups sour cream 160g
- 1 ½ teaspoons vanilla extract
- 4 large eggs room temperature, lightly beaten
For the Guava Glaze
- 500 grams of guava (If you do not know what guava paste is or where to find it check the FAQ section.
- 1/2 cup + 2 tablespoons of water
Instructions
Preheat & Crust
- Grease your springform pan with butter and preheat the oven to 325°F (160°C).
- Crush graham crackers and walnuts, add sugar, and mix with melted butter. Press into a 9” springform pan.
- Bake your crust for 10 minutes and let it cool while you prepare the cream cheese mixture
Cheesecake Mix
- In a stand mixer, blend cream cheese until smooth. (use paddle attachment, and remember to use room temperature ingredients)
- Add sugar, sour cream, and vanilla; mix well.
- Gradually add lightly beaten eggs, stirring after each addition. Be careful not to incorporate too much air. (see tips*)
Bake
- Pour batter into the springform pan.
- Place the springform pan inside a larger pan.
- Place both pans inside a large roasting pan with warm water halfway up the sides.
- Bake at 325°F (160°C) for 50-60 minutes (possibly longer, check my tips)
Cool
- Turn off the oven and let it cool inside for 10-15 mins.
- Remove it from the oven and let it cool on top for an additional 10 minutes.
- After it has been cooling outside the oven for about 10 minutes, gently loosen the crust with a knife all around your cheesecake.
- Now, leave it on top of your oven to cool for 1-2 hours, then refrigerate overnight.
Guava Glaze
- In a saucepan, melt guava with water.
- Pour over chilled cheesecake.
- Return the cheesecake to the fridge to allow the guava layer to firm up or slice it right away so that the guava topping will drizzle as you cut (see pictures).
- Serve and enjoy!
Notes
- To ensure a crack free cheesecake make sure to read and follow all the tips provided in this blog post.
- Calories provided are estimates based on standard serving sizes. Individual portion sizes and ingredient variations may affect nutritional values
Nutrition
Troubleshooting and FAQ:
Possible causes: Overmixing the batter, sudden temperature changes, or overbaking.
Solution: Mix ingredients just until combined, cool gradually, and check for doneness at 50 minutes and go over the Tips section I have written for you.
Use the springform pan-inside a larger pan-inside a roasting pan method I have described here, you can also watch this America’s test kitchen on youtube which explains the whole thing very well.
Cream cheese not at room temperature. Use room-temperature cream cheese and mix gently.
Cover it well and refrigerate for a few days.
Absolutely! Feel free to omit the nuts or replace them with extra cookies for a nut-free option.
Use a disposable aluminum tray as a substitute. It works just as well to prevent leaks.
Adjust water quantity while making the glaze for your preferred consistency. Add a bit more if needed.
Guava paste, also known as “goiabada” in Portuguese, is a sweet, thick jelly-like preserve made from fresh guava fruit. To prepare guava paste, guava fruit is cooked down with sugar until it reaches a thick, smooth consistency. It is very similar to making fruit jam. It can vary in sweetness, ranging from mildly sweet to intensely sweet, depending on the recipe and personal preference.
You can typically find guava paste in the international aisles of your grocery store. If it’s not available there, or if your store lacks an international section, try checking Portuguese shops, bakeries, or Latin American grocery stores, as they often carry it. If you’re unable to locate it in your local area, Amazon usually has it in stock, albeit possibly at a slightly higher price.
I hope you liked this recipe, and all my tips! 🙂 If you make it I would love if you’d leave me a comment 🙂
Until Next Time,
Claudia




Leave a Reply