
Brazilian Baked Kibe, also called Quibe or Kibbeh, is a comforting dish that brings together Middle Eastern flavors with a Brazilian touch. It’s kind of like a meatloaf — made with ground meat and bulgur wheat. My grandma used to make hers as little fried croquettes, but I like to keep things simple and bake mine instead. It’s just as tasty and so much easier! And if you like this recipe, check out my Rice with Angel Hair Pasta and my Greek Salad with Pickled Red Onions — I often serve them together, and I’m sure you’ll love it too!

How is Brazilian Kibbeh Different from the Traditional Kibbeh Recipe?
The traditional Middle Eastern Kibbeh is famous for its delicious flavor and that signature two-layer texture — a crisp outer shell and a flavorful filling inside. It’s truly something special, and if you’ve never tried it, you absolutely should! But as amazing as the classic version is, it can also be quite the project to make. There are so many authentic recipes out there — fried Kibbeh, raw Kibbeh, and more — each with its own twist.
My take? A Brazilian-inspired version that keeps all those comforting flavors but makes life a little easier. Instead of shaping and frying, I bake it — simple, practical, and just as satisfying. This baked Brazilian Kibbeh brings together the best of both worlds: the warmth of Middle Eastern tradition and the straightforward style we love in Brazilian cooking. It’s an easy, flavorful way to enjoy a timeless dish without spending hours in the kitchen.
Why should I make this recipe?
If you’re wondering why you should add Brazilian Kibbeh to your repertoire, here are some compelling reasons:
1. Flavorful and Tasty: Because, let’s face it, deliciousness is the ultimate reason we cook, right? Who would bother otherwise? But don’t you worry, this Brazilian Kibbeh won’t let you down. It’s packed with fantastic flavors that will have you savoring every bite.
2. Make Ahead: Prepare a batch of Kibbeh in advance and you can store it in your fridge or freezer until you are ready to bake it.
3. Freezable: Kibbeh freezes beautifully, ensuring you’ll always have a convenient meal option on hand for busy days.
4. Ideal for Postpartum: I can personally attest to the joy of having a stash of Kibbeh in the freezer during the postpartum period. They make for nourishing and comforting meals, effortlessly ready whenever you need them.
5. Bake from Frozen: Best of all, you can bake it straight from the freezer without the need for thawing, making life a little easier and mealtimes more enjoyable.
2. Economical Choice: One more reason to love Kibbeh is its cost-effectiveness. Bulgur wheat is generally affordable, and ground beef, often considered one of the most budget-friendly beef options, makes this dish an economical choice for your family meals.
3. Nutritional Value of Bulgur Wheat: As a wholesome and accessible ingredient, bulgur wheat stands out as a valuable addition to your diet. It’s a rich source of fiber, so it may promote healthy digestion, and provides essential vitamins and minerals like magnesium, manganese, and B vitamins. Thanks to its low-fat content, bulgur wheat contributes to a balanced and nutritious meal.
Perfect for Little Ones: We’ve all been there, the eternal struggle to make mealtime enjoyable for our toddlers and kids, especially when they encounter foods that are a bit too challenging to chew. And if you’re familiar with my kids, you’ll know that it’s always a battle to get them to eat anything. That’s precisely why this Brazilian Kibbeh has become one of our go-to meals. With it, there’s no need to fight for every bite. It’s a proven winner with the little ones. My theory is that it’s because it’s easy to cut and chew, but let’s put theories aside. The undeniable fact is that they absolutely adore it, and that’s all that truly matters!
Ingredients:

1. Fine Bulgur Wheat: This essential ingredient is a whole grain that’s been cracked and partially pre-cooked, making it quick and easy to work with. You can typically find it in Brazilian, Portuguese, or Middle Eastern shops. I often source mine from brazilianmarket.ca or Amazon.ca.
2. Extra Lean Ground Beef: For this recipe, I’ve opted for extra lean ground beef. When handling ground beef, it’s a good practice to remove it from the fridge for a few minutes before working with it. This brief pause allows the beef to reach room temperature or at least not be as cold to the touch. This makes it more pleasant to mix by hand without feeling like your fingers are about to fall off.
2. Onions, Garlic, fresh Mint, Parsley, Green Onions, Salt, black pepper: These flavor-packed ingredients are the soul of Brazilian Kibbeh. While I’m using fresh ingredients today, dry ones can work just as well. Use what’s at your disposal to infuse your Kibbeh with delicious taste.
3. Olive Oil: This is a non-negotiable must-have! Once, in the midst of postpartum exhaustion and the demands of needy children, I attempted to make Kibbeh and forgot to add olive oil. It turned out super dry and wasn’t as enjoyable to eat. I went ahead and ate it anyway, not wanting to waste food. Surprisingly, my kids did too, but I didn’t mention my mishap. So, take my advice, don’t forget to include olive oil; it’s a game-changer for achieving the perfect texture and taste.
Directions:

- Begin by soaking the bulgur wheat: Place the bulgur wheat in a large bowl and cover it with boiling water. Allow it to sit for about 20-30 minutes or until the water is fully absorbed by the bulgur wheat.

2. Once the bulgur wheat is ready, preheat your oven to 400F
3. Start preparing the rest of the ingredients. You can either add onions, garlic, mint leaves, parsley, green onions, and salt to a food processor to chop them finely or finely chop and dice them using a knife.

4. Combine the chopped spices with the soaked bulgur wheat, and don’t forget to add the olive oil and salt.

5. Now its time to add the ground beef to the mixture. Mix everything together thoroughly. It is best to use your hands for this.

6. Grease a Pyrex dish or ceramic baking tray with a touch of olive oil (see recipe notes for further details).
7. Transfer the beef mixture into your prepared dish, pressing it down to create a compact layer.
8. Drizzle a bit more olive oil on top. You can also make little decorative slashes using a knife if you like.

Bake your kibbeh to perfection. The cooking time will vary depending on the dishware you choose and its size. Keep an eye on it; it’s done when the top turns crispy and golden brown and, if you used a transparent bakeware like a Pyrex dish, you can see it bubbling when its gets close to it being done baking.
Recipe Notes:
- You can use a large 9×13 dish for baking or choose to use two smaller ones, allowing you to bake one today and keep the other in your freezer for future use.
- If storing an entire Pyrex dish in your freezer isn’t practical, you can use this alternative method: Line your chosen Pyrex dish with plastic wrap, shape your kibbeh within it, and cover it with more plastic wrap. Freeze it while in the container to maintain its shape. Once frozen, remove it from the Pyrex dish and place it in a large Ziplock bag. If it doesn’t fit, then just wrap it using an extra layer of plastic wrap. When you’re ready to cook, simply unwrap the whole thing, place it in your Pyrex dish, drizzle olive oil on top, and bake it straight from the freezer.
Storage Instructions:
You can freeze your kibbeh for up to three months, making it a fantastic make-ahead option. The beauty is that it can go straight from your freezer to your oven, saving you time and effort. Once baked, you can store any leftovers in your fridge for up to three days, or you can freeze them and reheat them later for a convenient and delicious meal.
Common Substitutions:
If fresh herbs are not readily available, you can easily substitute them with dried herbs in this recipe without compromising on flavor.
Variations
While this recipe is a delightful variation of the traditional Middle Eastern Kibbeh, in Brazil, you might encounter variations that include fillings like cheese, tomatoes, and more. Feel free to experiment and customize it to your liking, but the classic version without additional fillings is always my favorite option. You can also mold the kibbeh mixture into little croquettes and deep fry them, either in your air fryer or with some oil. You can also add some Middle Eastern spices to it if is your preference.
Equipment:
To prepare this Brazilian Kibbeh, you’ll need either a food processor or a knife and cutting board for chopping; a large mixing bowl for combining the ingredients, and a Pyrex or ceramic dish for baking.
Keep in mind that the thickness of your kibbeh layer influences the texture: a thinner layer results in a crispier top, while a thicker one balances a crisp top with a moist interior. The choice depends on personal preference, so why not try both and discover which style suits your taste best?
How to Serve:
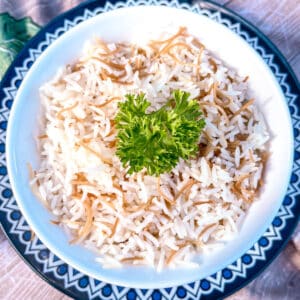
I enjoy serving Kibbeh with a side of zesty lime wedges or lemon wedges, alongside white rice or rice and vermicelli noodles. Complementing this dish, a side of lentils and a simple tabouli salad would add a delightful touch to the meal.

Brazilian Baked Kibbeh
Equipment
- 1 large bowl
- 1 food processor or a cutting board and knife
- 1 silicone spatula or wooden spoon
- 1 or 2 ceramic or glass bakeware you can use a large 9×13 baking dish or two smaller ones.
Ingredients
- 2 cups fine Bulgur Wheat
- 3 cups boiling water
- 2 small onions or 1 large onion
- 3 large garlic cloves
- 25 mint leaves or use dry mint leaves
- 1/4 cup parsley leaves
- 1/4 cup Green Onions 1/4 cup
- Salt to taste for reference I use 2 tablespoons
- 900 g Ground beef 2 llbs
- 1/2 cup Olive Oil
- 1 tablespoon Italian seasoning (optional)
Instructions
- Place the bulgur wheat in a large mixing bowl and pour boiling water over it. Let it stand for about 20 minutes, or until the grains have absorbed all the liquid and softened. Fluff with a fork to loosen before using.2 cups fine Bulgur Wheat, 3 cups boiling water
- Once the bulgur wheat is done soaking, preheat your oven to 400°F (200°C).Now, get the rest of your ingredients ready. You can put the onions, garlic, mint leaves, parsley, green onions, and salt in a food processor to chop them up really small. If you don’t have one, just use a knife and chop everything finely by hand.2 small onions, 3 large garlic cloves, 25 mint leaves, 1/4 cup parsley leaves, 1/4 cup Green Onions
- In a large bowl, combine the chopped ingredients with the soaked bulgur wheat. Add the olive oil, salt, and Italian seasoning (if you’re using it). Mix well until everything is evenly combined.Salt to taste, 1/2 cup Olive Oil, 1 tablespoon Italian seasoning
- Lastly, add the ground beef to the bowl. Use your hands to mix everything together really well until the meat and seasonings are fully combined.900 g Ground beef
- Grease a Pyrex dish or ceramic baking tray with a touch of olive oil.
- Transfer the beef mixture into your prepared dish, pressing it down to create a compact layer.
- Drizzle a bit more olive oil on top. You can also make little decorative slashes using a knife if you like.
- Place the kibbeh in your chosen baking dish. Cooking time will vary depending on the size and type of dish you use. Keep an eye on it — it’s ready when the top turns crispy and golden brown. If you’re using clear bakeware, like a Pyrex dish, you’ll also see it bubbling near the edges when it’s almost done.
Video
Notes
- Mixing by Hand
Use your hands to mix thoroughly — this helps bind the bulgur and meat for better texture. -
Baking Dish Choice
Cooking time depends on the size and type of dish. Shallow dishes cook faster and give a crispier top. Glass or ceramic dishes show bubbling edges, which is a good indicator the kibbeh is done. -
Serving & Storing
Best served fresh and warm. Leftovers keep well in the fridge for up to 3 days and can be reheated in the oven. -
Make-Ahead & Freezing Tips
This is such a great make-ahead dish! You can prepare it ahead of time and store it in the fridge or freezer. I often place a layer of plastic wrap on a tray, then place the kibbeh on top, add another layer of plastic wrap, and freeze it. Once it’s solid, I lift the whole piece and place it in a ziplock bag (or wrap again in plastic wrap) for storage. When ready to bake, just unwrap, remove the plastic, and place it in a Pyrex dish and then straight in the oven — no thawing needed. You can also freeze it after it’s cooked, and it still tastes amazing. This makes kibbeh perfect for meal prep, to bring to a postpartum mom, or just to have on hand for yourself. So practical and so delicious!
Nutrition
FAQs:
The Kibbeh is ready when the top turns crispy and you can see it bubbling. The cooking time may vary depending on your dish and its size, so keep and eye on it.
Olive oil is highly recommended for this dish I wouldn’t use anything else.
To heat frozen Kibbeh, simply place it in a preheated oven, and bake until it’s heated through and the top turns crispy. No need to thaw beforehand. To reheat it you can use your microwave for a couple of minutes until warm. (Just be sure your container can also go from your freezer straight to your oven.)
Absolutely! Kibbeh is a wonderful make-ahead dish that you can prepare in advance and freeze. It’s perfect for special occasions or whenever you need a quick, flavorful meal.
When freezing, wrap the Kibbeh tightly in plastic wrap or place them in an airtight container. This helps maintain their freshness and prevents freezer burn.
Eat leftovers stored in your fridge within 3 days.
No. It contain bulgur wheat which is not gluten free.
I hope you thoroughly enjoy making and savoring this Brazilian Kibbeh. The fusion of Middle Eastern tradition with Brazilian flair creates a truly unique and delightful dish. Now, it’s your turn to experience it and let me know how it turned out. Don’t forget to follow tasty recollections on social media. Until next time, Happy cooking!
Claudia


Leave a Reply