
Hi Friends! Today, I’m bringing you a special recipe: No-Knead Wool Bread. I know that bread-making can feel a bit intimidating for some, so I wanted to share a recipe that’s always a success over here. It’s fluffy, it’s delicious, and it looks gorgeous—truly the type of bread that disappears within hours of baking. I’m not kidding! I always hope for leftovers, but it never lasts long enough. At least it’s proof everyone’s loving it, right? Oh and if you are looking for more bread recipes and you are a beginner go check out my 10 Fold No Knead Bread for a super easy and impressive looking artisan bread.

Light as Air Pumpkin Bread: This bread is wonderfully light and fluffy, perfect for those who crave a soft texture in every bite.
No-Knead Pumpkin Bread: Bursting with the warm flavors of fall, this easy-to-make pumpkin bread is the ultimate seasonal treat.
Fluffy Beet Bread: True to its name, this bread is not only incredibly light and airy but also features a stunning, vibrant color.
Brazilian French Bread: For Brazilians, this bread is a nostalgic favorite and a classic.
10 Fold No Knead Bread: For a super easy and impressive looking artisan bread. Perfect for beginners!
Also, I can hardly believe it, but here we are—celebrating a year of delicious memories and sharing the 99th recipe on the blog! Over the past year, we’ve cooked up so many wonderful dishes together, and there are even more exciting recipes on the way, so stay tuned!

Equipment
- One 9-inch round baking pan ( I have made this in a simple aluminum fluted pan and with just a regular round pan without the tube in the middle. Both work well.
- A 10-inch round baking pan would also work; you might just end up with a slightly larger “hole” in the middle.
- Rolling Pin

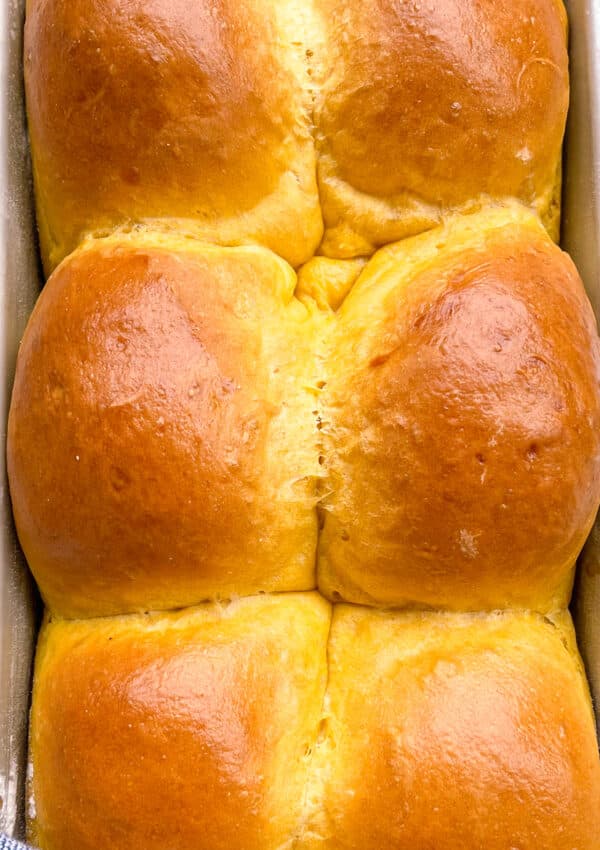
I have made this recipe many times using different pans. Here is a picture of the same recipe using regular round pan without the tube in the middle. As you can see you can see the shae is slightly different, but the taste is the same! So, use what you have at home. 🙂
Ingredients
- Milk
- Granulated yeast
- Kosher salt
- Sugar
- Unsalted butter
- All-purpose flour
How to Make Wool Bread:
- Add Ingredients: In a large mixing bowl, add all of the ingredients, starting with everything but the flour. Once the other ingredients are combined, add the flour last.
- Mix: Use a spoon or Danish whisk to mix in the flour. No kneading is needed, but you may need to use your hands to incorporate the last bits of flour into the dough.
- Rest: Cover the dough (not airtight) and let it rest at room temperature for 2 hours.
- Chill or Bake: After resting, you can place the dough in the fridge for easier handling later (I find cold dough is easier to shape), or proceed directly to the next step if you want to bake it right away.
- Prepare the Pan: Grease your 9-inch round baking pan with butter.
- Divide the Dough: After the dough has rested, divide it into five equal parts.
- Roll and Shape: Using a rolling pin, roll each dough piece into a flat, oval shape, about 8 inches long. Cut thin lines along the bottom third of the dough to create the wool-like texture, but don’t cut all the way through. Leave the top two-thirds uncut.
- Roll Up the Dough: Starting at the uncut edge, roll the dough up into a log and place it seam-side down into the prepared pan. Repeat with the remaining pieces, arranging them around the edge of the pan in a circle.
- Rest: Let the shaped dough rest for another hour at room temperature.
- Brush and Bake: Brush the top of the dough with milk. Preheat your oven to 350°F (175°C) and bake for 30-40 minutes or until the bread is golden brown.
- Cool: Let the bread cool down before slicing to avoid a gummy texture.
How to Serve
Bread continues to bake even after it’s out of the oven, so allowing it to cool for a bit helps prevent a gummy texture. Once cooled, slice and enjoy with a simple spread of butter, jam, or cream cheese. It’s a perfect addition to breakfast or any snack time, with a soft and fluffy texture that pairs beautifully with both sweet and savory toppings.
How to Store
If by some miracle you have leftovers, store the bread in an airtight container or wrap it tightly in plastic wrap to keep it soft. It will stay fresh at room temperature for up to 2 days. For longer storage, you can freeze the bread—simply wrap it in plastic wrap and place it in a freezer-safe bag. When you’re ready to enjoy it again, thaw at room temperature or reheat it in the oven for that fresh-out-of-the-oven warmth!
If you have doubled or triple the recipe you can store the dough inside your fridge. I usually use mine within 4 days of making it. But of course, if the dough changes color or smells weird you should toss it ( that has never happened to me though, I usually use mine within 1-2 days of making it) Like I said the first batch is usually gone in hours so I often make the next batch the very next day.
Variations
While I like to keep my Wool Bread plain, allowing the fluffy texture to shine on its own, there are endless ways to customize it with fillings. You can add sweet fillings like Nutella, cinnamon sugar, or jam for a dessert-like treat, or go savory with cheese, herbs, or garlic butter swirled into the dough.
Can I Double the Recipe?
Yes, you absolutely can! In fact, I double this recipe all the time. Here’s what I do:
I use a large bowl to let the dough rest and rise. Once it’s ready, I take half of the dough, portion it, shape it, and bake it as usual. The remaining half stays in the bowl, covered but not airtight, and goes straight into the fridge. When I’m ready to bake again, I simply take it out of the fridge, portion, shape, and bake just like before.
A quick tip: When storing the dough in the fridge, make sure your container is large enough and covered but not sealed airtight. The dough will continue to expand and release gases, so leaving a little room for those gases to escape is important. If the container is too full and sealed too tightly, it could burst. So keep it slightly open to avoid any mess!
One more tip: If your dough has been resting in the fridge for a few hours, portion and shape it, then place it in your baking pan. Allow it to come to room temperature before baking to ensure a beautiful oven spring and an even rise.


No knead Wool Bread
Equipment
- One 9-inch round baking pan A 10-inch round baking pan would also work; you might just end up with a slightly larger "hole" in the middle.
- Pastry Brush
- Rolling Pin
Ingredients
- 312 grams Milk 1 cup + 6 tablespoons
- 5 grams Granulated Yeast 1 1/2 teaspoons
- 8 grams Kosher Salt 1 1/2 teaspoons
- 28 grams Sugar 2 tablespoons
- 28 grams Melted Unsalted Butter 2 tablespoons or 1/4 stick
- 425 grams All-Purpose Flour 3 cups
- Milk Just a little bit to brush over the top
Instructions
- In a large mixing bowl, add all of the ingredients, starting with everything but the flour. Once the other ingredients are combined, add the flour last.
- Use a spoon or Danish whisk to mix in the flour. No kneading is needed, but you may need to use your hands to incorporate the last bits of flour into the dough.
- Cover the dough (not airtight) and let it rest at room temperature for 2 hours.
- After resting, you can place the dough in the fridge for easier handling later (I find cold dough is easier to shape), or proceed directly to the next step if you want to bake it right away.
- Grease your 9-inch round baking pan with butter.
- After the dough has rested, divide it into five equal parts.
- Using a rolling pin, roll each dough piece into a flat, oval shape, about 8 inches long. Cut thin lines along the bottom third of the dough to create the wool-like texture. Leave the top two-thirds uncut.
- Starting at the uncut edge, roll the dough up into a log and place it seam-side down into the prepared pan. Repeat with the remaining pieces, arranging them around the edge of the pan in a circle.
- Let the shaped dough rest for another hour at room temperature.
- Brush the top of the dough with milk. Preheat your oven to 350°F (175°C) and bake for 30-40 minutes or until the bread is golden brown.
- Let the bread cool down before slicing to avoid a gummy texture.
Notes
Nutrition
FAQ
Why does my dough seem sticky after resting?
It’s normal for this dough to be a little sticky, especially before it’s fully rested and refrigerated. If it feels too sticky to handle, chill it in the fridge for an hour before shaping.
Can I make this bread in advance?
Absolutely! You can keep the dough in the fridge for up to 3 days before shaping and baking it.
Troubleshooting
Why is my bread gummy in the middle?
The bread needs time to cool down completely after baking. Bread continues to cook as it cools, and slicing it too early can lead to a gummy texture. Let it rest!
My dough didn’t rise much. What happened?
Check your yeast! If it’s expired or wasn’t activated properly, the dough won’t rise as expected. Also, make sure the dough is resting in a warm place.


Leave a Reply